Here’s a step-by-step guide on how to use SobiPro in Joomla:
Step 1: Install SobiPro
- Download SobiPro: Go to the official SobiPro website and download the SobiPro extension.
- Login to Joomla Admin: Go to your Joomla admin panel by navigating to
yoursite.com/administrator. - Install SobiPro:
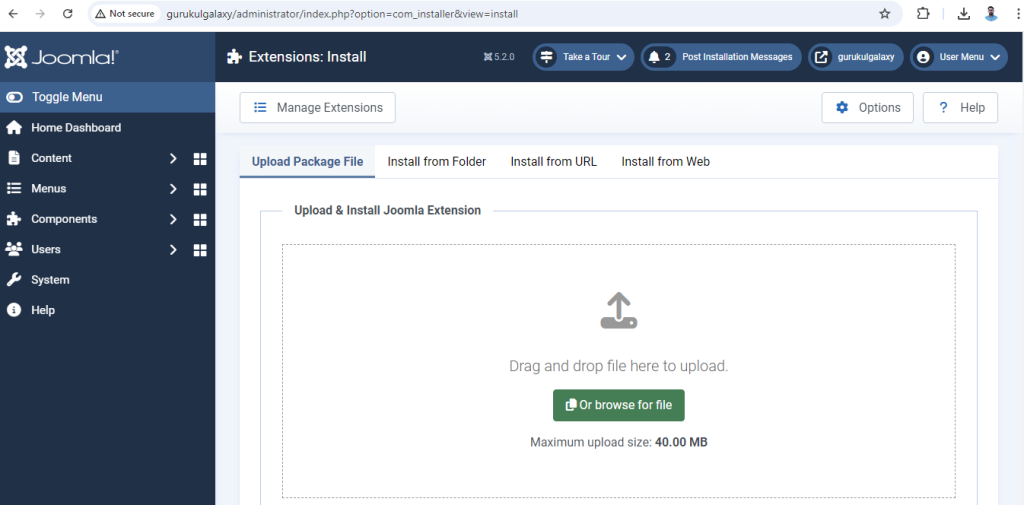
- In the Joomla admin panel, go to Setting> Extensions > Manage > Install.
- Upload the downloaded SobiPro package by clicking Upload Package File or using the Install from URL option.
- After successful installation, a message will appear confirming that SobiPro is installed.
Step 2: Access SobiPro
- Go to SobiPro: In your Joomla admin panel, navigate to Components > SobiPro to open the SobiPro component.
Step 3: Create a Section
- Add New Section:
- In the SobiPro dashboard, click on New Section.
- Give the section a name and description. This will be the directory’s main container.
- Set up additional options like enabling user submissions and categories if needed.
- Click Save & Close.
Step 4: Add Categories
- Create Categories:
- Go to the created section and click on Categories in the SobiPro menu.
- Click New to create a new category. Provide a title, description, and optionally upload a category image.
- You can create as many categories as needed for your section.
Step 5: Add Fields to the Section
- Manage Fields:
- In the SobiPro section, go to Fields Manager.
- Click on New Field to create custom fields for your directory (e.g., Name, Description, Phone Number, etc.).
- Choose the field type (e.g., Textbox, Textarea, Dropdown, etc.).
- Configure the field options, such as whether it is required, displayed in the search, or visible to users.
- After setting up the fields, click Save.
Step 6: Create Entries
- Add New Entry:
- Go back to your section’s dashboard.
- Click on Entries > New.
- Fill in the entry details using the fields you previously created.
- Select the appropriate category for the entry.
- Click Save & Close.
Step 7: Set Up Front-End Access
- Menu Item for SobiPro:
- In Joomla, go to Menus > Main Menu > New.
- Under Menu Item Type, click Select > SobiPro.
- Choose SobiPro Section and select the section you created earlier.
- Set the Menu Title and save it. Now, your SobiPro section will appear as a menu item on your Joomla site.
Step 8: Configure Permissions
- Set User Permissions:
- Go to Components > SobiPro > Permissions.
- Define the permissions for different user groups (e.g., who can submit entries, edit them, view specific content, etc.).
- Set restrictions based on user roles if needed.
Step 9: Customize Layout and Templates
- Edit Layout:
- Go to SobiPro Templates under your section to customize the layout and display of your entries and categories.
- You can modify the HTML, CSS, and use SobiPro-specific tags to style your directory.
- Save your changes and check the front-end to see how the layout appears.
Step 10: Test the Front-End
- Test Directory:
- Visit your Joomla site’s front-end and navigate to the SobiPro section via the menu.
- Test adding a new entry (if allowed), browsing categories, and viewing the submitted listings.
- Ensure everything functions as expected, including form submissions, search functionality, and layouts.
Step 11: Extensions and Add-ons
- Install Add-ons (Optional):
- SobiPro offers various add-ons like search modules, payment systems, and multi-language support.
- Install and configure them according to your needs for extra functionality.
By following these steps, you can successfully use SobiPro to create and manage directories in Joomla!