To easily backup your WordPress site using UpdraftPlus, follow these step-by-step instructions:
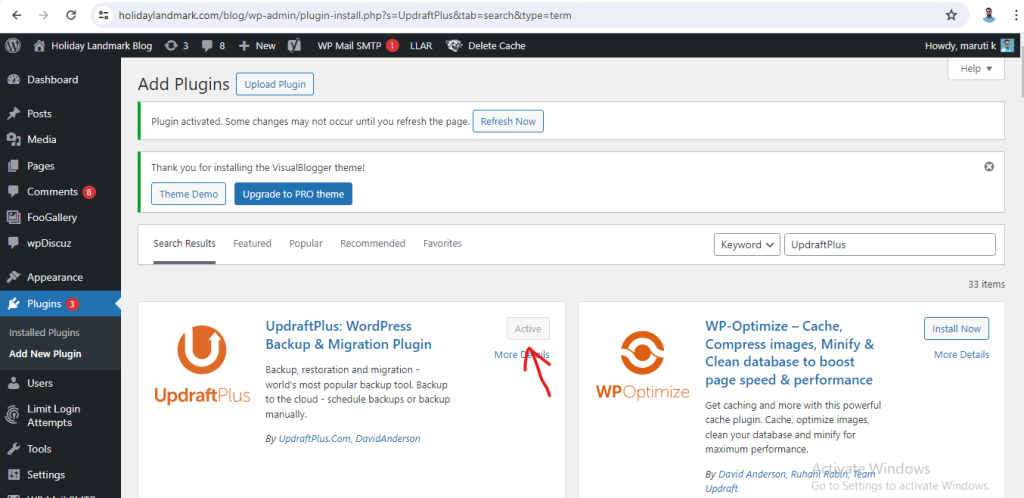
- Install and activate the UpdraftPlus plugin on your WordPress site. You can do this by navigating to the “Plugins” section in your WordPress dashboard and clicking on “Add New.” Search for UpdraftPlus and click on “Install Now” followed by “Activate.”

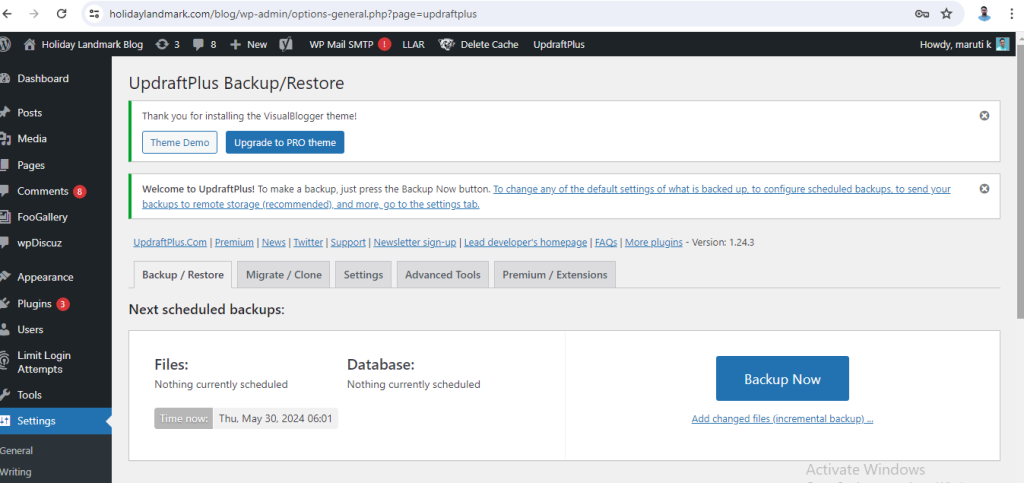
2. Once the plugin is activated, go to the UpdraftPlus settings by clicking on “Settings” > “UpdraftPlus Backups” in your WordPress dashboard.

3. In the UpdraftPlus settings, you can configure your backup settings such as how often you want to back up your site, where you want to store the backups, and what files you want to include in the backup.

4. To manually back up your site, click on the “Backup Now” button. UpdraftPlus will then start backing up your site’s files and database.
5. You can also schedule automatic backups by setting the frequency of backups in the UpdraftPlus settings.
6. To restore your site from a backup, go to the “Existing Backups” tab in the UpdraftPlus settings and click on the “Restore” button next to the backup you want to restore from.
By following these steps, you can easily backup and restore your WordPress site using UpdraftPlus, ensuring that your site’s data is safe and secure.